
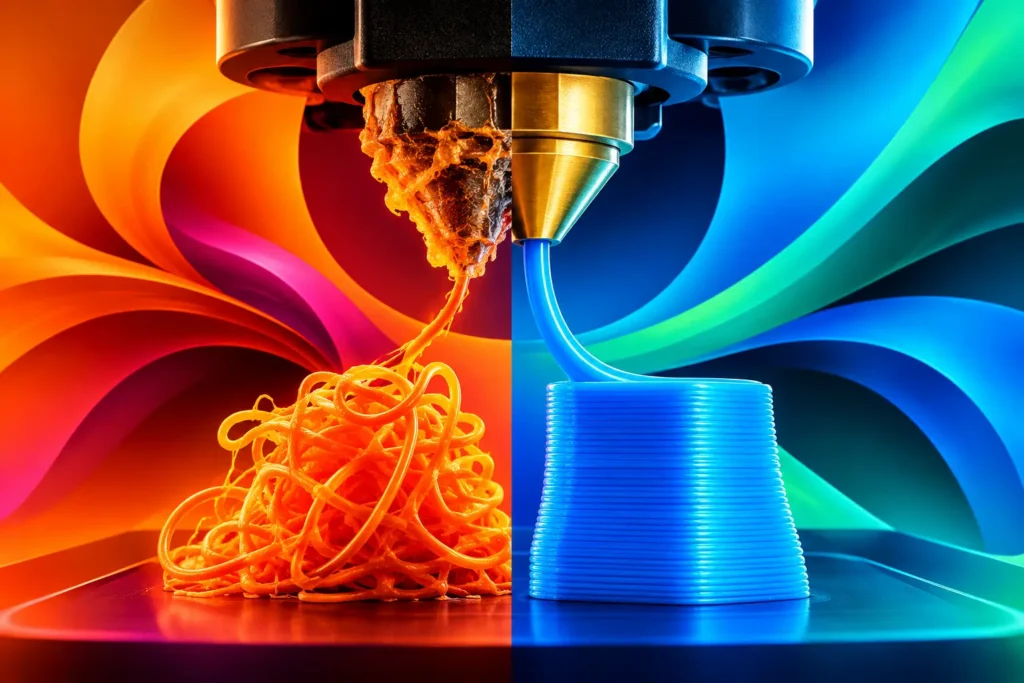
PETG is tough, glossy, and ideal for functional parts, but that sticky reputation is earned. If you want to reduce PETG nozzle buildup, do not start by cranking retraction settings to the extreme. Start by controlling the heat and moisture that make PETG cling to the nozzle in the first place.
A small bead of material on the nozzle is normal during a long print. A growing black blob that drags across the top surface, catches on infill, or finally drops onto your part is not. The good news: most buildup comes from a handful of settings and hardware conditions you can diagnose quickly.
Why PETG Sticks to the Nozzle
PETG needs more heat than PLA, and it stays tacky longer after extrusion. That is great for layer adhesion, but it means any filament that oozes or curls upward has a better chance of catching the nozzle. Once material sticks, more material can collect on it. A clean nozzle becomes a dirty nozzle fast.
The main causes are usually temperature that is too high, wet filament, poor retraction tuning, a nozzle that is too close to the print, or a partially clogged nozzle that sends filament out at an angle. You may have more than one issue at the same time, so make changes methodically instead of changing every setting in one slicer session.
Start With a Clean, Healthy Nozzle
Before tuning profiles, inspect the hot end. Burnt residue on the outside of the nozzle gives fresh PETG something to grab. Heat the nozzle to your normal PETG printing temperature, then carefully wipe it with a brass brush or a folded shop towel held with pliers. Keep brushes away from the heater wires and thermistor.
Look closely at the extrusion pattern. Filament should exit straight down in a smooth, consistent line. If it curls sharply to one side, sputters, or requires unusual force to feed, treat that as a clog warning. A cold pull, nozzle cleaning needle, or nozzle replacement can save hours of chasing slicer settings.
Also check for a leak above the heater block. Plastic collecting around the threads or heat block is different from normal nozzle buildup. It often means the nozzle and heat break are not sealing against each other internally. That repair requires proper hot tightening, not more retraction.
Dial In Temperature Before Retraction
For most PETG, temperature is the biggest lever. Too cool and layers may not bond well. Too hot and the melt becomes runny, strings more aggressively, and lingers on the nozzle. Your best temperature is the lowest one that still gives strong layer adhesion, smooth extrusion, and reliable flow.
Print a temperature tower using the speed and cooling settings you actually use for functional parts. Watch for stringing, surface gloss, bridges, and small blobs around travel points. A slightly lower temperature often makes a noticeable difference in nozzle cleanliness without sacrificing part strength.
Do not assume every PETG spool wants the same setting. Pigments, transparent blends, nozzle size, and printer design all affect the result. Transparent PETG may prefer a different temperature than an opaque black or ash gray spool. Start within the filament maker’s recommended range, then tune from there.
If buildup appears only after the first hour or two, temperature can still be the culprit. A hot nozzle surrounded by warm air inside an enclosure may need a small reduction compared with an open-frame print.
Dry Filament Makes a Cleaner Print
PETG absorbs moisture from the air. When wet filament reaches the nozzle, the water turns to steam and disrupts extrusion. You may hear popping, see tiny pits in the surface, notice extra strings, or find wispy residue collecting around the nozzle.
Drying is not a cosmetic step. It improves flow consistency, reduces ooze, and helps prevent the random blobs that ruin an otherwise clean print. If a spool has been sitting out for days in a humid shop, dry it before you overhaul your slicer profile.
Use a filament dryer or a controlled low-temperature drying setup suitable for PETG. Afterward, store the spool in a sealed container with fresh desiccant. If the problem improves immediately after drying but returns later, storage is the real issue.
Retraction Should Control Ooze, Not Fight It
Retraction helps during travel moves, but excessive retraction is not a buildup cure. Too much can pull softened PETG into the heat break, cause inconsistent restart pressure, and create blobs when extrusion begins again.
Tune retraction in small steps. Direct-drive printers usually need much less retraction distance than Bowden systems. The goal is simple: reduce travel strings while maintaining clean, repeatable starts after each travel move.
Retraction speed matters too. Very fast retraction can be harsh on PETG and may grind filament or create pressure swings. Use a moderate speed, test it on a model with multiple travel moves, and look for the best balance between strings and restart marks.
Wipe settings can help when used carefully. A short wipe moves the nozzle over the just-printed path while pressure releases, making it less likely that a dangling strand will follow the nozzle. Avoid huge wipe distances that create under-extruded seams.
Fix Nozzle Height and First-Layer Squish
PETG does not like being pressed hard into the build plate. A nozzle that is too close creates excessive back pressure and can smear material outward until it rides up around the nozzle. The first layer may look overly flattened, rough, or translucent in spots.
Raise the nozzle slightly compared with an aggressively squished PLA first layer. You still want a connected, stable first layer, but the individual lines should retain some definition. On textured build surfaces, too much squish can also make PETG grip so hard that part removal becomes its own problem.
If blobs show up beyond the first layer, check your flow ratio or extrusion multiplier. Over-extrusion leaves more molten plastic than the nozzle can lay down cleanly. Calibrate flow with a single-wall test and make small adjustments. Even a few percentage points can turn a smeared top surface into a clean one.
Use Cooling and Speed With Purpose
PETG needs less cooling than PLA, but no cooling at all can leave small features too soft. When the next layer arrives, the nozzle can drag through material that has not had time to set. That drag creates buildup and ugly scars.
Use moderate part cooling after the first few layers, then adjust based on the part. Large, strong brackets often print well with lower fan speeds. Small posts, sharp corners, and detailed parts may need more cooling or a longer minimum layer time. The trade-off is real: too much fan can reduce layer bonding, while too little can make the print soft and messy.
Printing speed has a similar balance. If you push a high flow rate beyond what your hot end can melt consistently, pressure fluctuates and PETG starts leaving uneven deposits. Slow down outer walls, top surfaces, and small perimeters first. You do not need to make the entire print slow – just protect the areas where appearance and nozzle contact matter most.
Travel Paths Can Prevent PETG Blobs
A nozzle crossing open space is more likely to pull a string than one traveling over printed material. Enable travel options that keep the nozzle inside the printed area when they make sense for your model. Combing, avoid-crossing-perimeters features, and intelligent travel routing can reduce visible stringing and lower the chance of a strand catching the nozzle.
For parts with a visible top face, consider placing the seam where it will not become a repeated blob on a critical edge. A random seam may spread artifacts around the model, while a controlled seam puts them in one predictable location.
Z-hop is situational. It can prevent the nozzle from dragging across tall or warped features, but it adds movement time and can increase stringing on some machines. Turn it on when the nozzle is physically scraping the part. Leave it off if the real issue is ooze during travel.
A Fast PETG Troubleshooting Order
When PETG starts coating your nozzle, work from the most likely causes to the most revealing tests:
- Clean the nozzle and confirm extrusion exits straight.
- Dry the filament if there is popping, stringing, or inconsistent flow.
- Lower nozzle temperature in small increments.
- Verify nozzle height and reduce any over-extrusion.
- Tune retraction and wipe only after temperature and filament condition are under control.
- Add moderate cooling or slow down small, detailed features.
This order keeps you from masking a moisture or temperature problem with aggressive retraction. It also gives you clear feedback after every change.
Build a Profile You Can Trust
Once you find settings that keep the nozzle clean, save them as a PETG baseline profile. Record the filament brand and color, nozzle size, temperature, fan range, retraction values, and flow adjustment. That gives you a reliable starting point for the next spool instead of forcing you to tune from zero.
Quality PETG makes this process easier because consistent diameter and material formulation produce more predictable flow. Ddub Tech PETG is built for makers who want strong, smooth parts without turning every project into a troubleshooting marathon.
A clean nozzle is not about chasing a perfect, spotless hot end for every second of a print. It is about preventing buildup from becoming a defect. Give PETG the right heat, dry material, sensible pressure control, and enough time to set, and your printer can spend less time collecting blobs and more time making parts worth showing off.